• Bỏ qua primary navigation
  • Skip to main content
  • Bỏ qua primary sidebar

Thủ thuật thiết kế website

Chia sẻ kinh nghiệm thiết kế website

  • Trang chủ
  • Joomla
    • Thủ thuật Joomla
    • Joomla Extensions
    • Joomla Themes
  • WordPress
    • Thủ thuật WordPress
    • WordPress Plugins
    • WordPress Themes
  • PHP Framework
    • Codeigniter
    • Laravel
    • Laminas
  • App Developer
    • React Native
    • Flutter
  • SEO
  • Chia sẻ
  • Phần mềm
Bạn đang ở:Trang chủ / App Developer / React Native / How to Integrate WordPress API in React Native

How to Integrate WordPress API in React Native

05/05/2021 - Administrator Để lại bình luận

A mobile app developer shares his experiences (and some code) he learned with working to integrate the WordPress REST API into a React Native application.

As I’m wrapping up one of my projects (a React Native WordPress app), I realized that many React Native developers will face the task of integrating WordPress’s REST API with React Native, so I decided to publish my findings. Hopefully, this will help out developers who are making their React Native apps using WordPress as a backend. To be clear, I don’t recommend using WordPress as a backend for your mobile apps, but it comes in handy if you already have a blog or a WooCommerce store running on WordPress.

As you already know, WordPress comes with a REST API out of the box. If you don’t believe me, just check out this link, which returns a paginated JSON response with all posts of my blog. I swear I only installed WordPress and did not do anything else. Try out the exact same URL, but for your blog, and you’ll see your own posts.

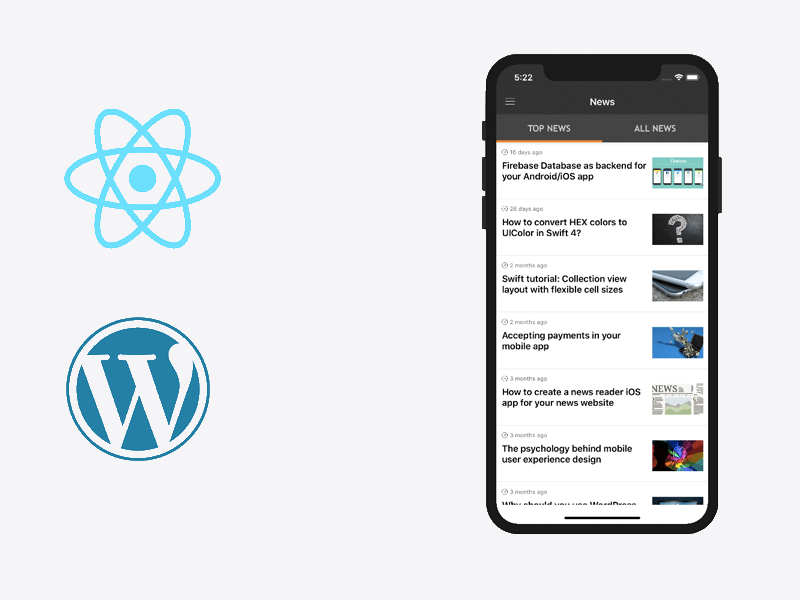
Now, what your React Native News Reader app has to do in order to display these beautifully formatted posts is to fetch them via an HTTP request. Fortunately, this is a simple task in React Native and even beginners should have done it at least once. Fetching data in React Native from a WordPress API is as simple as:

getPosts() {
    return fetch(
      "https://instamobile.io/wp-json/wp/v2/posts?page=" + this.state.page
    )
    .then(response => response.json())
    .then(responseJson => {
      this.setState(prevState => ({
        posts: [...prevState.posts, ...responseJson],
        isLoading: false
      }));
    })
    .catch(error => {
      console.error(error);
    });
 }

The “fetch” method makes a network request (GET) to a given URL. In our case, we provide the REST API URL to our WordPress blog (notice the instamobile.io URL from the third line). Once the response comes back, we parse it as JSON and then append the posts at the end of the existing (already displayed) articles. In practice, this is basically updating the state of the React component.

Notice the fact that the WordPress REST API is paginated, so in order to fetch a specific page, you need to provide an extra param within the GET request, named “page.” We store the current page in the state object, so that we always fetch a new page, as the user scrolls down the list of blog posts.

Additionally, in the state object, we also store an “isLoading” boolean variable, to inform the rendered component if there is a fetch request in process. In our React Native WordPress app, we display a spinner at the bottom of the screen to let the users know something is happening and they should wait for the newly fetched articles.

Without further ado, here’s how you display the retrieved WordPress articles in React Native:

return (
  <FlatList
    data={this.state.posts}
    renderItem={({ item }) => (
      <News
        navigation={this.props.navigation}
        title={item.title.rendered}
        image={item.acf.author_photo}
        day={item.date}
        data={item}
      />
    )}
    keyExtractor={item => item.id.toString()}
    onEndReached={this.handleLoadMore}
    onEndReachedThreshold={1}
  />
);

I hope this tutorial has been useful. Good luck in making your own React Native app with the WordPress REST API backend.

Nguồn : https://dzone.com

0 0 đánh giá
Article Rating
Theo dõi
Đăng nhập
Thông báo của
guest
guest
0 Comments
Cũ nhất
Mới nhất Được bỏ phiếu nhiều nhất
Phản hồi nội tuyến
Xem tất cả bình luận

Sidebar chính

LỜI NGỎ

Đây là blog cá nhân, cung cấp các thông tin, kiến thức và kinh nghiệm về lập trình và cuộc sống. Những bài viết được mình sưu tập từ nhiều nguồn, mọi chi tiết liên quan đến bản quyền xin vui lòng liên hệ qua email kairu2607@gmail.com ! Cám ơn rất nhiều.

Tìm kiếm

Thủ thuật Wordpress

T

Tạo trang chuyển hướng download cho WordPress

[flatsome ] Text Ticker (fade) For Top Bar In Flatsome Theme

[Flatsome] Text Ticker (Fade) for Top Bar in Flatsome Theme

Định Dạng ảnh Webp Là Gì ? Làm Thế Nào để Sử Dụng Webp Trên Wordpress 2024 Mới Nhất ?

Định dạng ảnh WebP là gì ? Làm thế nào để sử dụng WebP trên WordPress 2024 mới nhất ?

X

Xử Lý Lỗi Không Xem Được Giỏ Hàng Và Thanh Toán Woocommerce Website WordPress

Vì Sao Rank Math Vượt Trội – SEO WordPress 2023

Hướng Dẫn Ghi đè (override) Folder Inc Trong Child Theme Flatsome

Hướng dẫn ghi đè (override) folder INC trong child-theme Flatsome

Hướng Dẫn Quản Lý Trang Trong Website WordPress

Laravel

Một số câu hỏi câu hỏi phổ biến phỏng vấn tuyển dụng lập trình viên Laravel

Thiết kế cấu trúc folder HMVC cho Laravel

Tại sao lại sử dụng Laravel Service và Repository Pattern?

[Laravel 7] Tổ chức theo dạng Package/Module trong ứng dụng Laravel – P3: khai báo config, translation, helpers và migrations

[Laravel 7] Tổ chức theo dạng Package/Module trong ứng dụng Laravel – P2: Route và mô hình MVC

[Laravel 7] Tổ chức theo dạng Package/Module trong ứng dụng Laravel – P1: Giới thiệu và khởi tạo cấu trúc thư mục cơ bản

Codeigniter Framework

[CodeIgniter 4] Codeigniter 4 Remove Public and Index.php From URL

[CodeIgniter 4] How to upload Codeigniter 4 website on share hosting?

Sửa lỗi website Codeigniter 2.x không chạy được với PHP 7.x

[CodeIgniter 4] Sử dụng cURL trong CodeIgniter 4

[CodeIgniter 4] Sử dụng cache để tăng tốc website trong CodeIgniter 4

[CodeIgniter 4] Xử lý hình ảnh chuyên nghiệp trong CodeIgniter 4

[CodeIgniter 4] Hướng dẫn gửi mail trong CodeIgniter 4

Dịch vụ Thiết Kế Website

Phần mềm hay

Hướng dẫn chuyển đổi php version trong ~/.zshrc ở MacOs

Tim Hieu Ve He Dieu Hanh Macos 1

Sửa file Hosts trong hệ điều hành MacOS

Hướng dẫn sử dụng phần mềm putty trên Windows

Switching between multiple PHP versions on macOS

Byebye Edge Chromium/Microsoft Edge

Copyright © 2025 · Metro Pro on Genesis Framework · WordPress · Đăng nhập

wpDiscuz