I always struggle to remember the steps required in order to add a splash screen to a React Native app, and some tutorials out there are a bit outdated, so here is my take on the subject.
This tutorial will explain how to create a simple, seamless transition splash screen. No bells and whistles, only a simple logo centered on a plain background.
I used react-native init rn_splashscreen_tutorial to instanciate my project, using React-Native 0.60+.
The final code is available on github.
Note: if you are using Expo or Create React Native App you don’t need to go through all of this, this tutorial is for people that have either ejected their project or created it the good old way, using `react-native init`.
Also note that I’m not an iOS nor Android developer, so some steps may surely be improved. I’ll be happy to read how you would do it in the comments!
Splash screen assets
For this tutorial we will use the React logo. We need three sizes, to better match all the devices screen sizes (300px, 600px @x2, 900px @x3).
You can get those images from github.

Install and configure react-native-splash-screen
Step 1: install react-native-splash-screen :
yarn add react-native-splash-screen
or
npm install react-native-splash-screen –save
Depending on your package manager of choice.
WARNING: since React Native 0.60 we don’t need to link the libraries anymore, so don’t run react-native link. If you still are on 0.59 or before though, do run it:react-native link react-native-splash-screen
Step 2: update cocoa pods (mandatory for React Native 0.60+ or if you are using pods on your project):
cd ios && pod install && cd ..
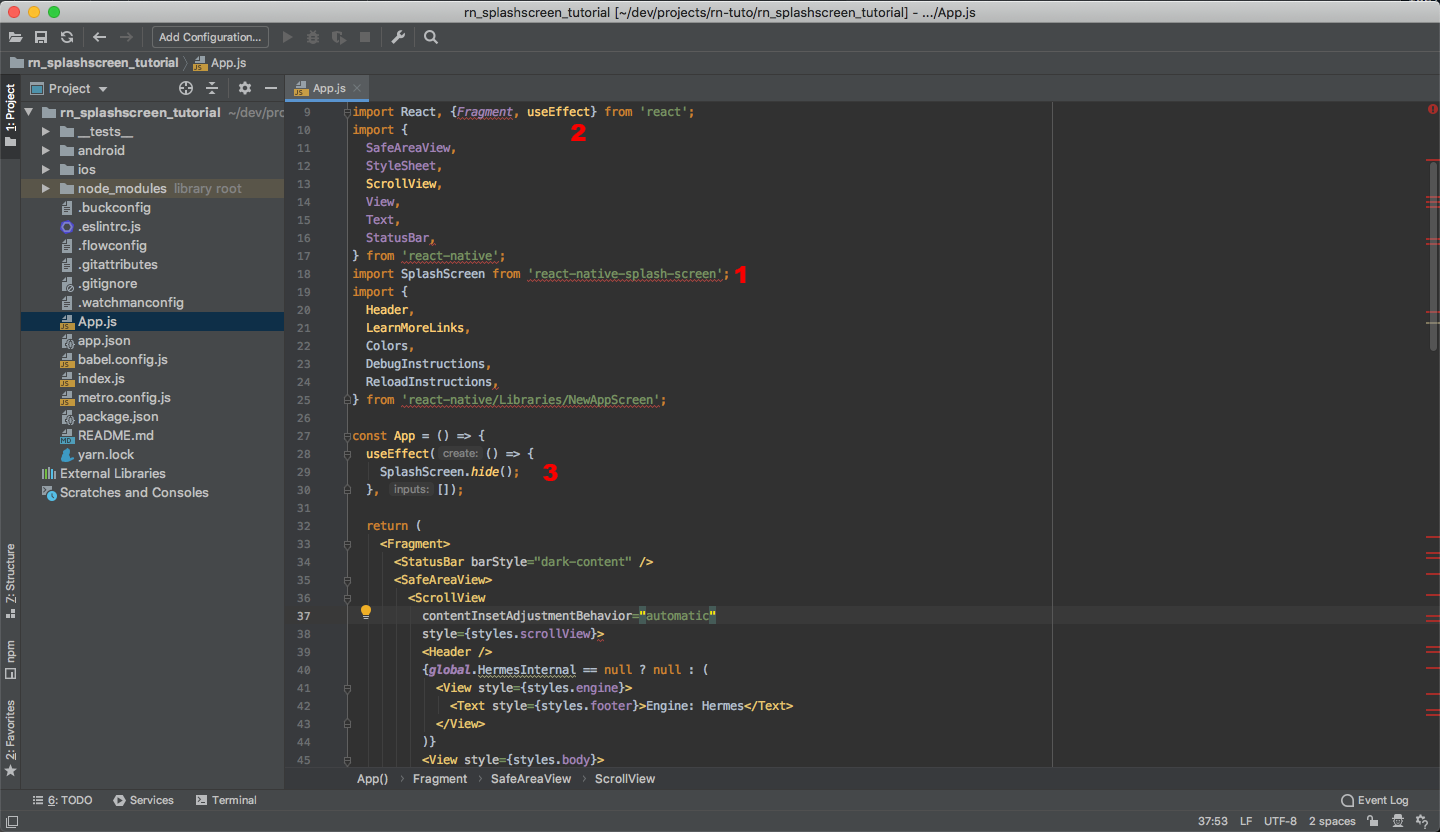
Step 3: update App.js
- Open
App.js - Add
import SplashScreen from 'react-native-splash-screen'with the other imports - Also import
{ useEffect }from react - Add a useEffect hook in the component that calls
SplashScreen.hide()
Optional:
- Add import
{ Platform }from react-native - Replace the line
<StatusBar barStyle="light-content" />
by
{Platform.OS === 'ios' && <StatusBar barStyle="light-content" />}
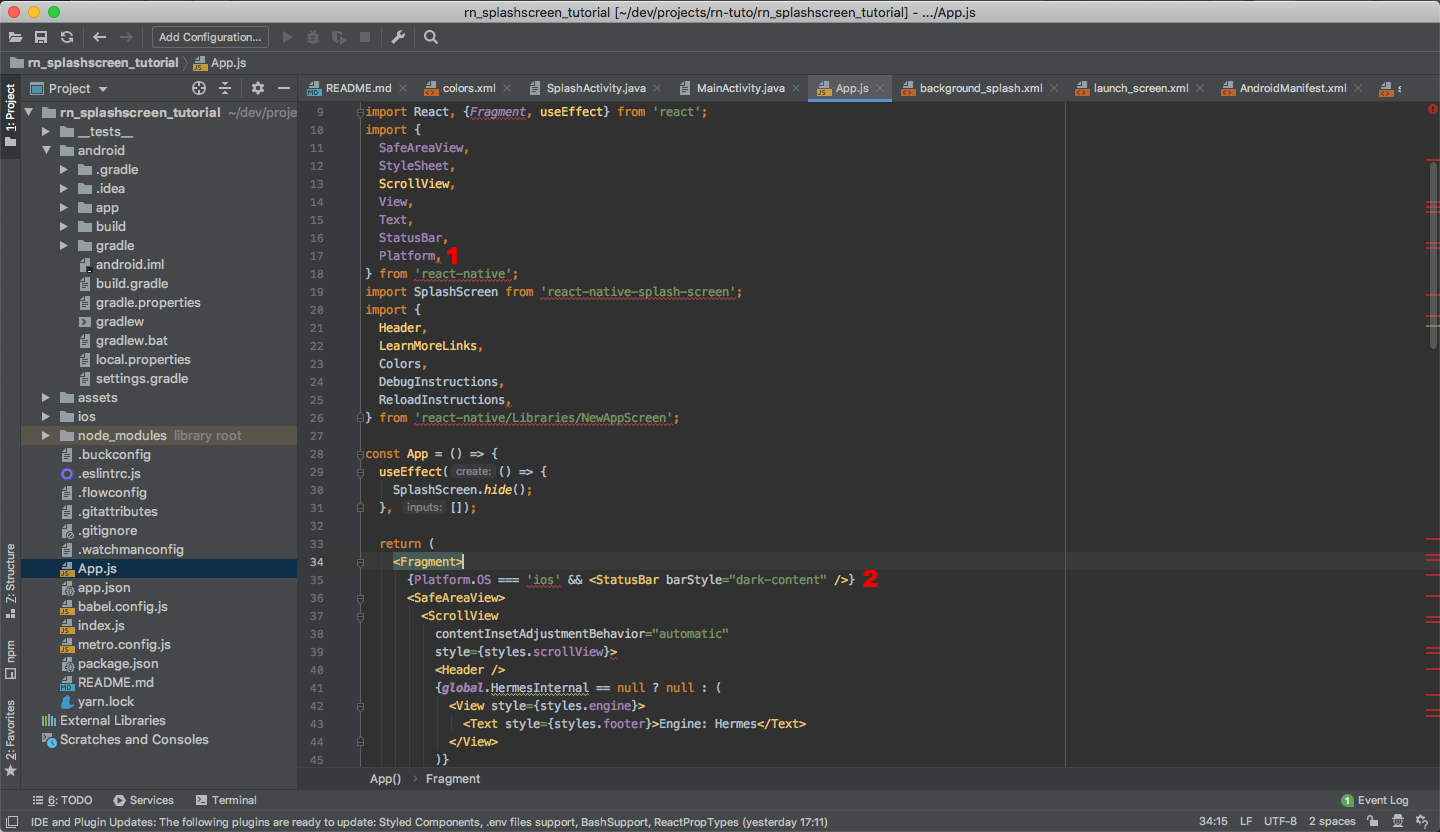
This step really depends on what you want to do with the status bar.
For the purpose of this tutorial I want to have a dark status bar on Android (I will define it in the Android code) but I want to keep the default behavior for iOS, thus the added condition.
Add a splash screen to an iOS app
First, open the project in Xcode.
Open a command line and from the project root and run
open ios/[project_name].xcworkspace
Note: Starting React Native 0.60, the iOS project uses cocoapods, so you have to open [project_name].xcworkspace and not [project_name].xcodeproj.
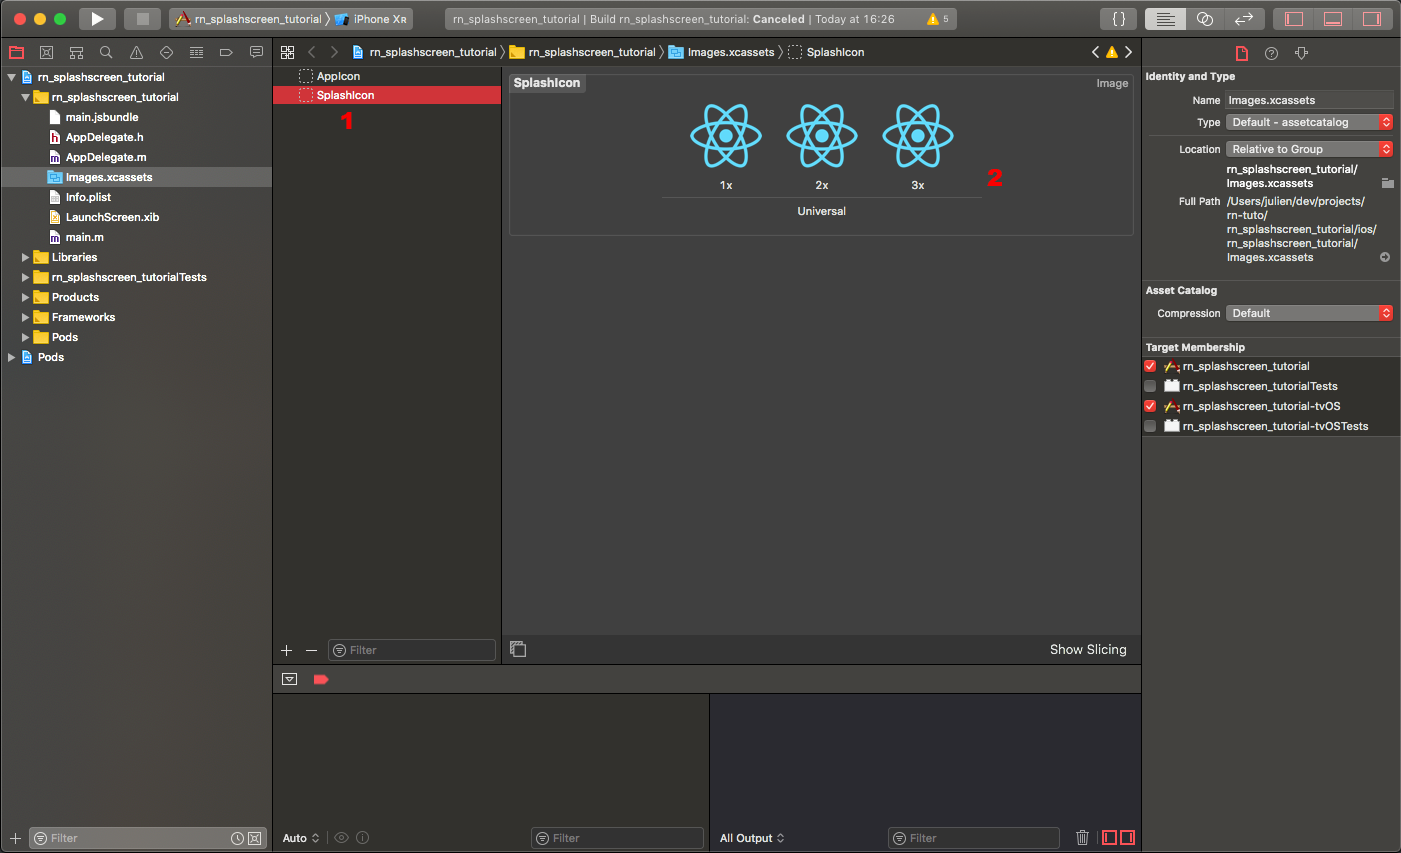
Add the image assets to the project
In the left most navigator:
- select [project_name] > [project_name] > Imagex.xcassets
- click the “+” icon in the second left navigator and select “New Image Set”

- name your image set “SplashIcon”
- Add the three images you downloaded earlier. You can drag and drop all of them at the same time, Xcode will sort them by pixel density automatically.
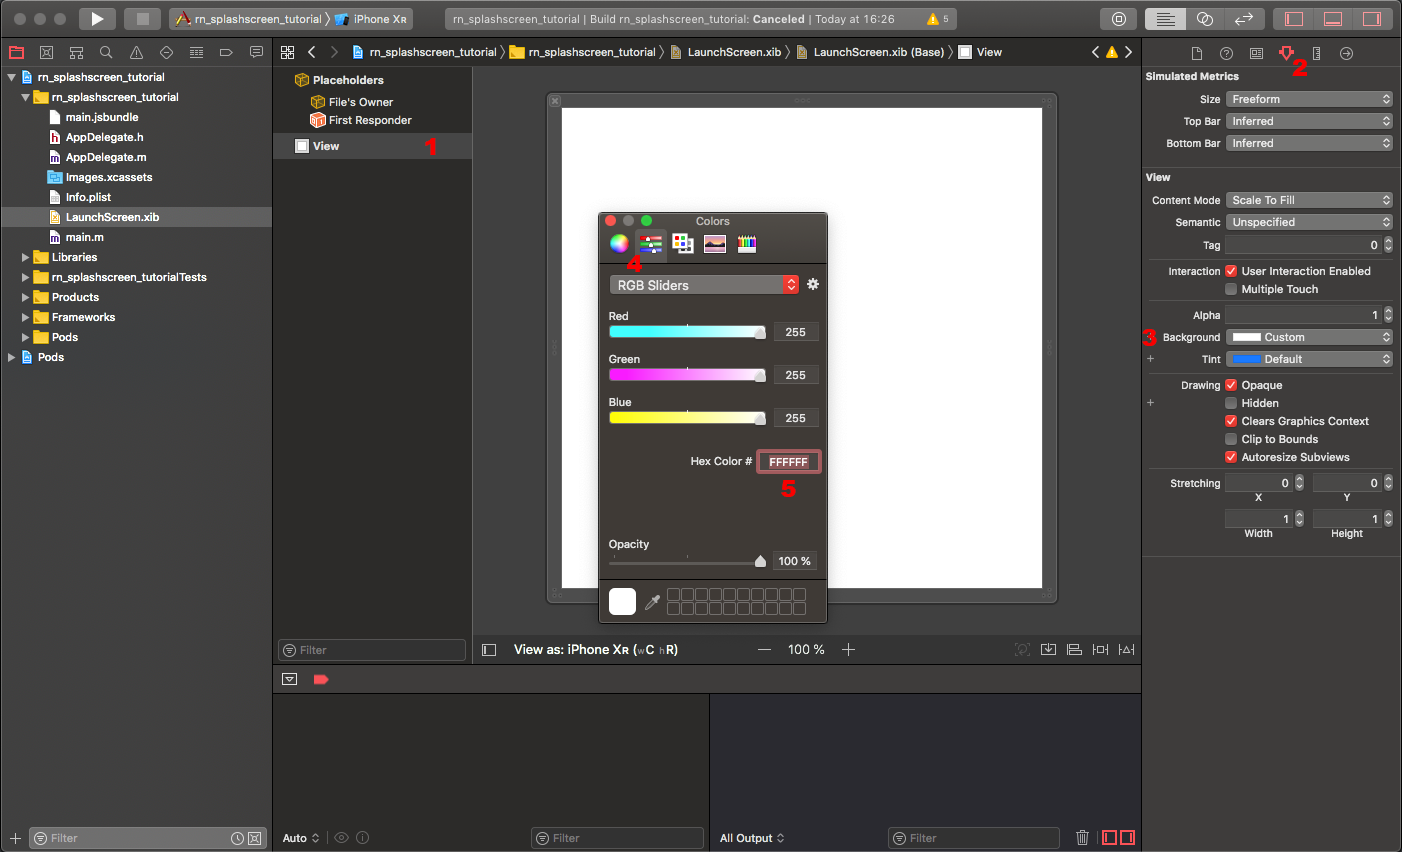
Change the background color
In the left most navigator, open LaunchScreen.xib and select “View”
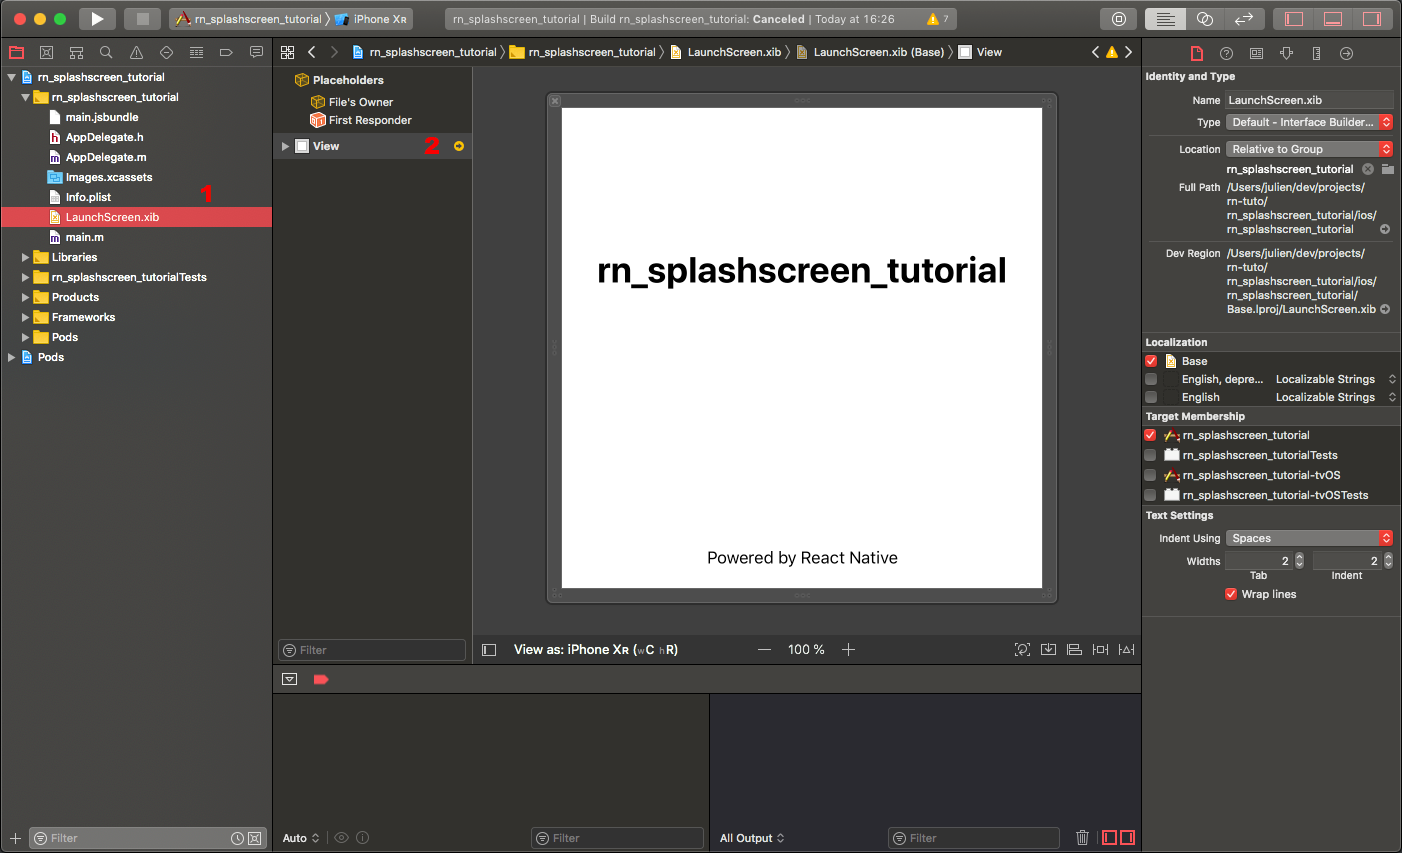
- Select the two elements, [project_name] and Powered by React Native and delete them
- In the second left navigator, click on View
- Then on the right navigator, click on the Attribute inspector icon (the one resembling a cursor or a small shield, 4th position)
- In the Background select list, select Custom, that will popup a dialog
- Select the color you want (ProTip: you can enter an hexadecimal value in the options of the second tab), here we will set #424242
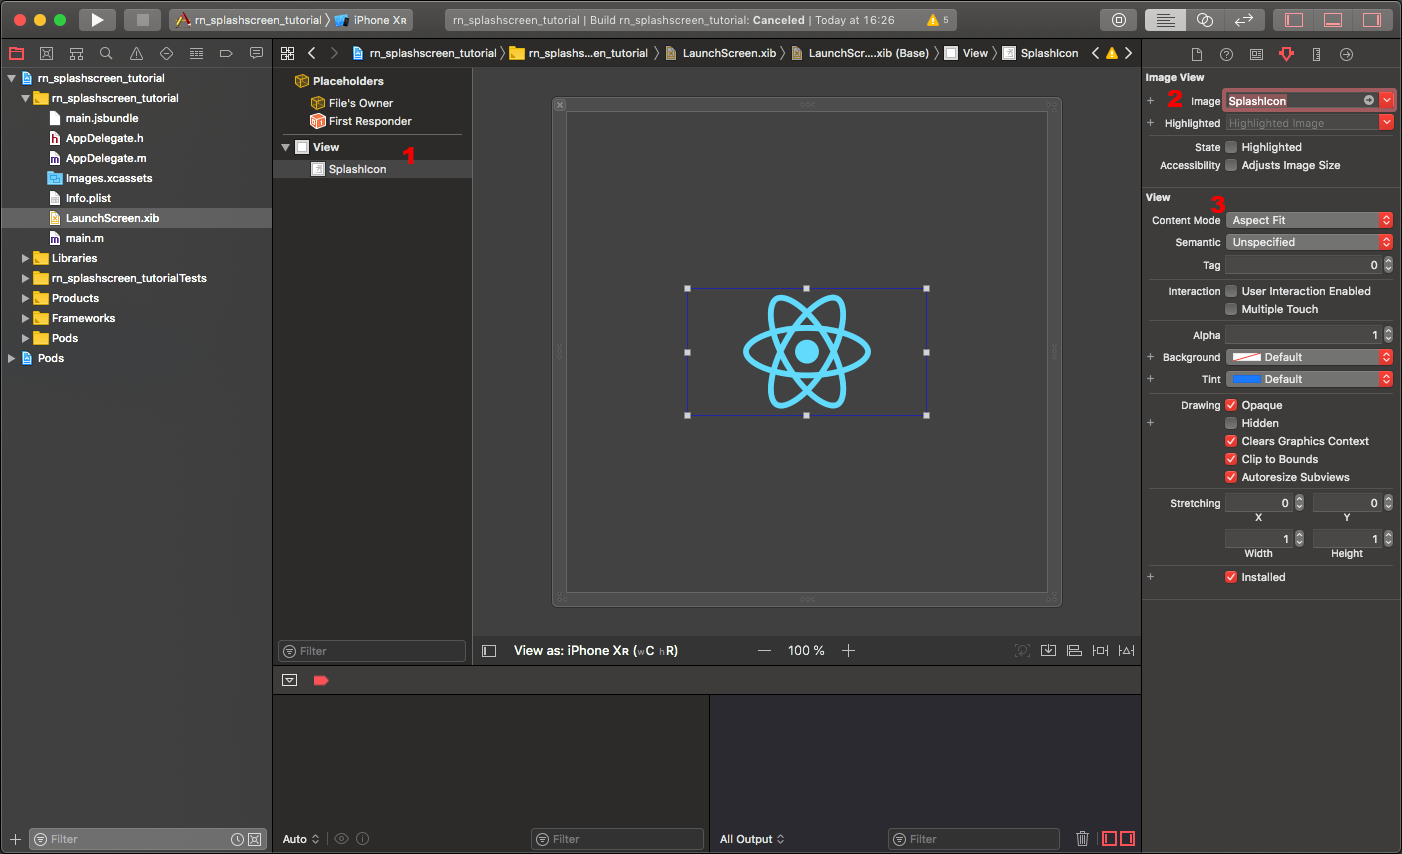
Add the icon to the screen
We now have to add the image we added to the project before.
- In the top right of the Xcode window, click on the Library icon (the one with a square inside a circle)
- Select Image view

- Make sure the Image View is a child of the View element, like in the next screenshot
- In the right navigator, select the SplashIcon asset from the Image select list
- Set the Content Mode option to Aspect Fit if it’s not already the case
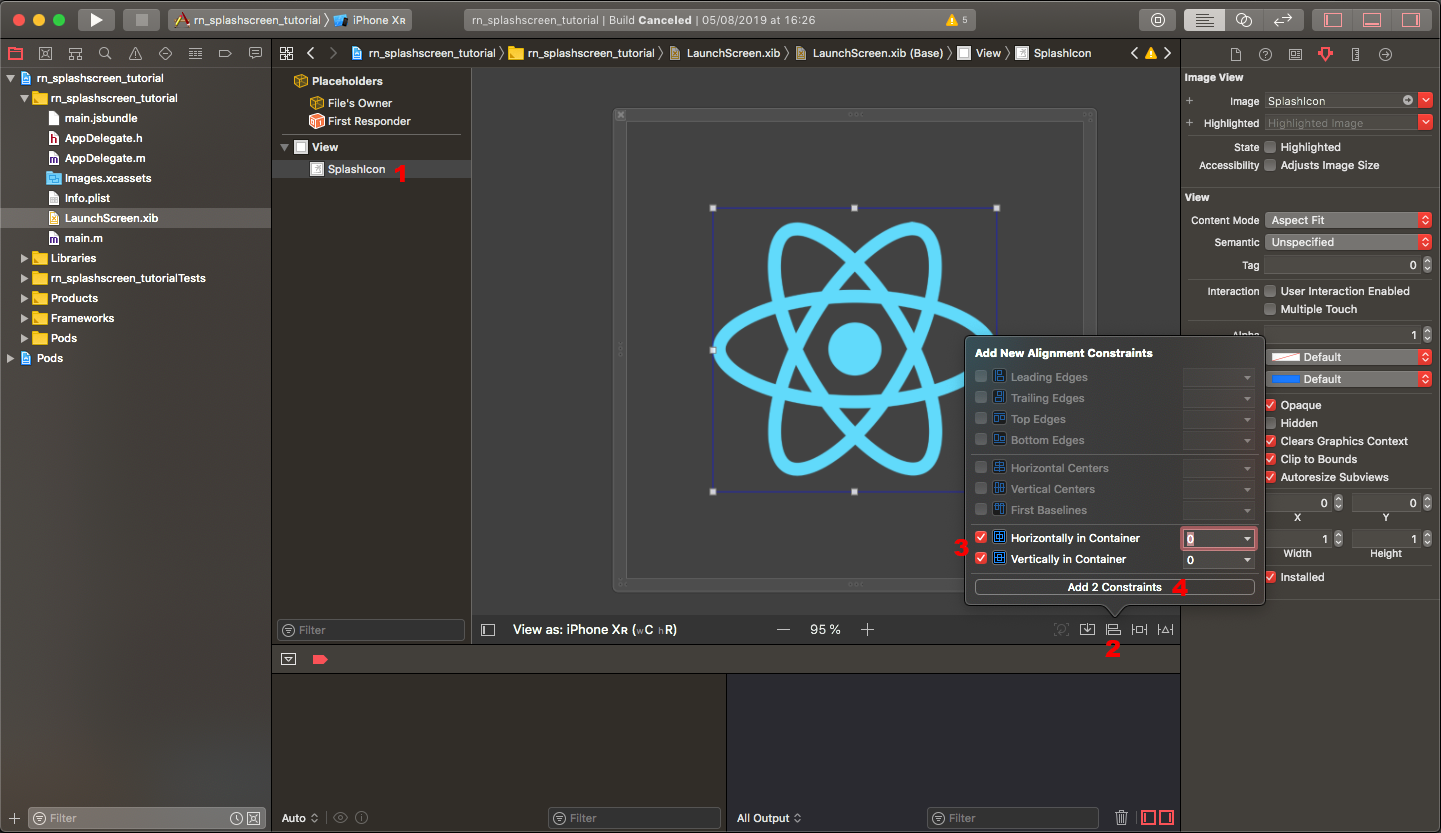
Center the image
We need to make sure the icon is centered regardless of the device the app is running on. To do that:
- Select the Image View in the second left navigator
- Click on the Align button at the bottom right of the editor
- Add new alignment constraints Horizontally in container and Vertically in container
At this point we have our splash screen working, but you can notice a white screen flashing just before the content is loaded.
What happens is that the splash screen is displayed by the native code, then the javascript part of the app is booted up while a white screen is briefly shown.
We also want the splash screen to be displayed during the React Native boot.
To do that we will use react-native-splash-screen.
Configure react-native-splash-screen
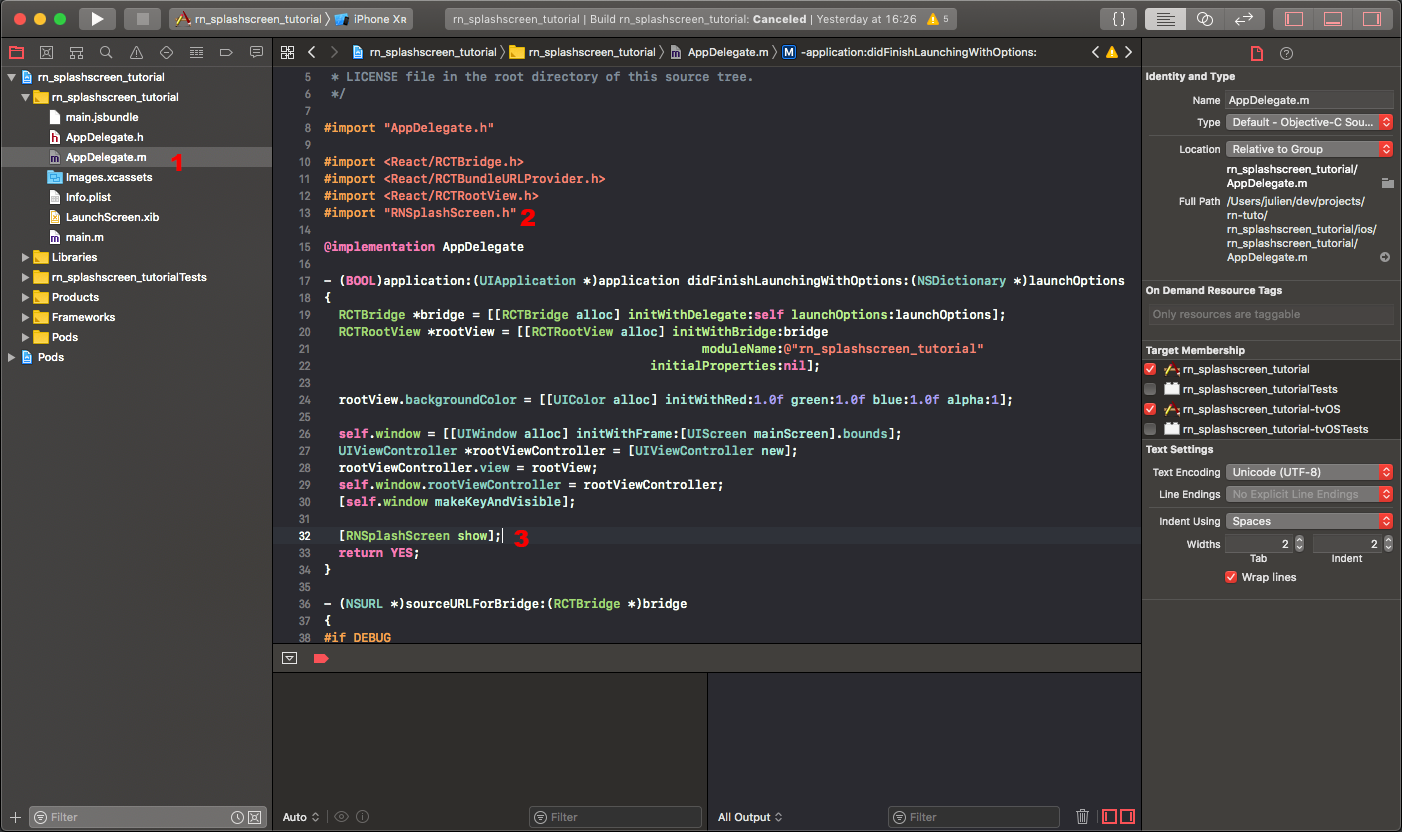
In Xcode, open the file [project_name] > [project_name] > AppDelegate.m
- Add
#import "RNSplashScreen.h"with the other imports - Add
[RNSplashScreen show];just abovereturn YES;in thedidFinishLaunchingWithOptionsmethod.
Change the status bar style (optional)
If you selected a dark color as the background of the splash screen, it would be better to have a light font instead of the current dark one, let’s change that.
- In Xcode open [project_name] > [project_name] > Info.plist
- Right-click in the displayed list and select Add row
- Add a row. The key should be Status Bar Style and the value UIStatusBarStyleLightContent

Conclusion
You now should have a perfect seamless transition splash screen in your iOS app.

Thanks / disclaimer
Thanks to Spencer Carli for this tutorial that helped me a lot to set up my first splash screen and which this article is based on!
Julien Galletta for Appstud
Nguồn : https://medium.com